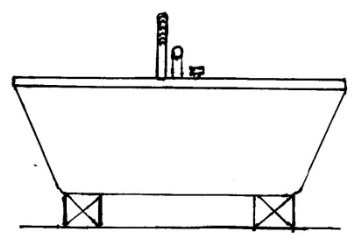
Determine your size for freestanding bathtub
Flex P-trap for Freestanding Bathtub
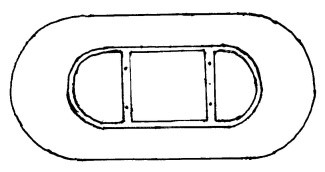
Flex FB-trap/24, Flex BP-trap/14, Flex CP-trap/18
After remodeling the bathroom it's usually very difficult to install a Freestanding Bathtub on second floor because you don’t have access to the p-trap, but the Flex p-trap will help you. All parts used for the drain Bathtub can be used for the Freestanding Bathtub.
To determine the size of the p-trap you need:
1. Information for the freestanding tub
2. Information for the water seal
3. Information for the flex p-trap
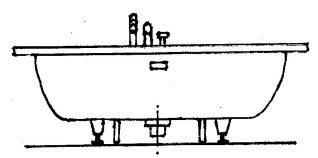
The Freestanding bathtub from Fig. 1, Fig. 2, Fig. 3 and Fig. 4 will help you determine the size. When the Freestanding bathtub it is on first floor you can test it for water leaks because you have access to the p-trap. The tolerance for measurement is ±0.5 inches.
First, check if the freestanding tub if it is made from one piece or two pieces.
Second, check the space under the floor.
Third, choose the p-trap from below and the dimensions for installing.
Forth, check the installation instructions for the flex p-trap and for the freestanding bathtub.
|
Fig. 1 (Flex FB-trap/24) |
Fig. 2 (Flex CP-trap/18) |
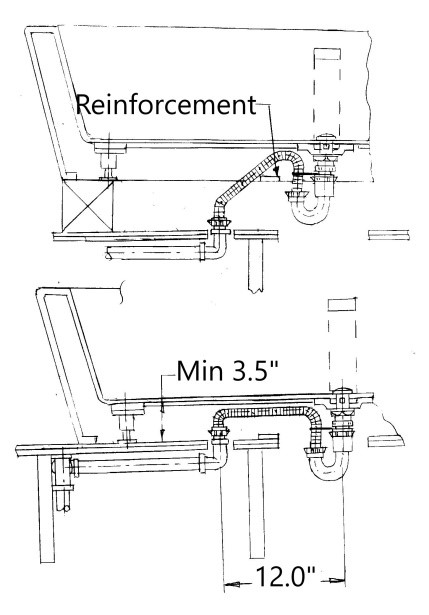
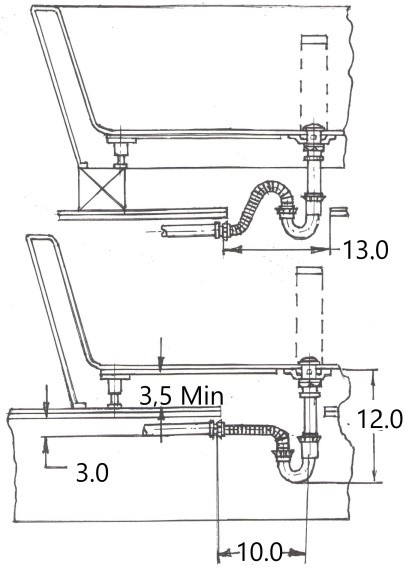
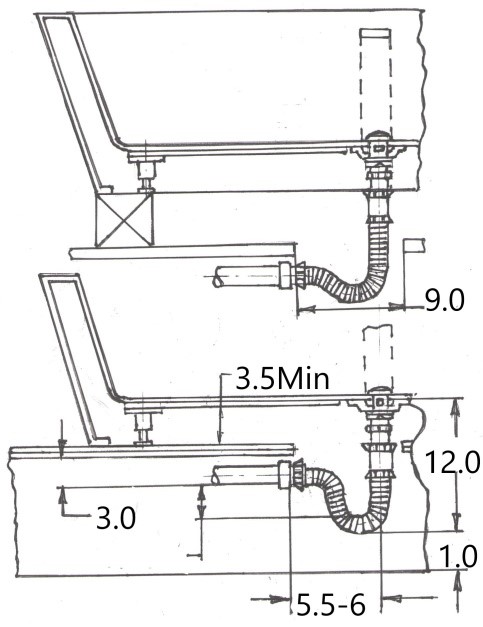
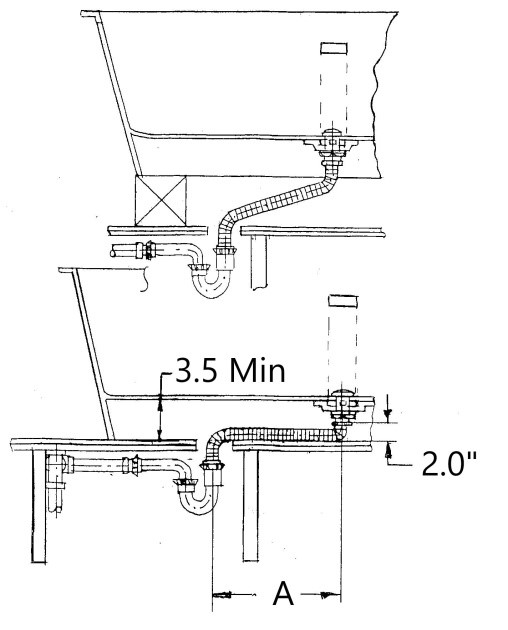
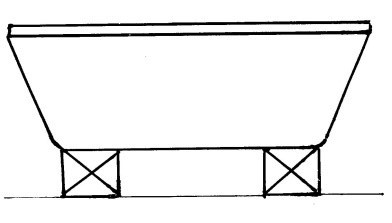
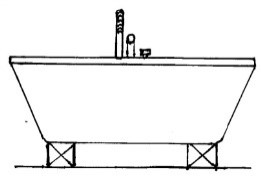
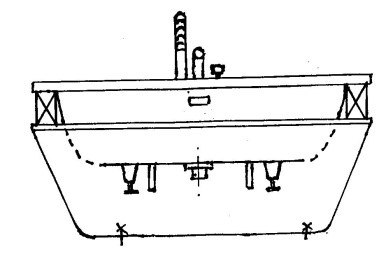
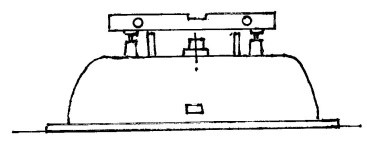
Every freestanding bathtub has a space between bottom of tub and floor of minimum 3.50 inches. The Flex p-trap for Freestanding Bathtub can be installed with the horizontal arm above the bathroom floor and under the bathroom floor.
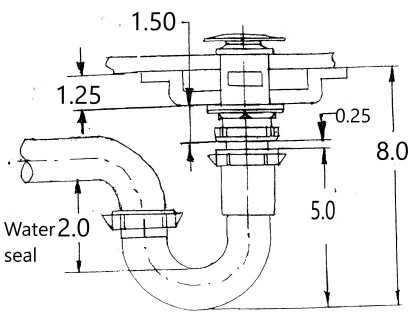
The best way to install the Flex P-trap it is with the horizontal arm under the bathroom floor and with the Marvin adapter in horizontal position Fig 2 and Fig. 3. If you use the dimensions from Fig 2 the flex p-trap will have 14 inches length (note: Flex BP-trap /14” flex bathtub p-trap). If you use the dimensions from Fig 3 the flex p-trap will have 18 inches length (note: Flex CP-trap /18”).
If the flex p-trap is installed with the horizontal arm above the house floor and with the Marvin adapter in vertical position Fig. 1, you have to use the Flex Freestanding Bathtub 24 inches length (note: Flex FB-trap /24)
NOTE: For Flex FB-trap /24 Fig. 1 we used a strainer with length 3.0 inches, tailpiece with length 3.0 inches and space under tub 3.5 inches. The water seal will be 2.5—4.0 inches.
If you have different dimensions, you have to add or subtract from length of the tubing. If you add one inch, the water seal will increase 0.5 inches.
|
Fig. 3 (Flex BP-trap/14) |
Fig. 4 (Flex BP-extension/overflow) |
The flex p-trap for freestanding bathtub can be cut for any specific length you need. If you can't move the drain from the original position of the bathtub, build the step around the tub and use the extension tube Fig. 4 (note: Flex BP-extension/overflow/32). If the space under strainer is minimum 2 inches, use Flex BP-extension with nuts and plastic washer Fig. 4, if the space under strainer is over 2.5 inches you can use the Flex BP-extension with coupling and plastic washer.. The Flex FB-trap replaces Shallow P-trap.
1. Information for Water seal
Each freestanding tub needs one p-trap.
1. If the room is too dry the water-seal will evaporate from p-trap.
2. If the vent is clogged, the sewer gas will push the water-seal away (back-pressure), and the gas will escape in the bathroom.
3. If the freestanding tub is installed above the other sink (second floor) and connected to the same draining line, (old house) water from the above creates partial vacuum (back-venting), which sucks the water out of the lower sink's trap
For this reason Plumbing code standardized the water seal to be between 2-4 inches.
If the house is new is recommended to use P-trap with 2 inches water seal, if the house is old and poor venting you can use Flex P-trap with water seal between 2.5-4.0 inches.
2. Information for Freestanding bathtub
After you bought the freestanding tub:
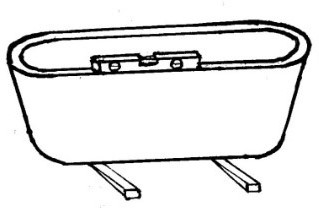
1. Check if the freestanding tub is made from one piece or two pieces.
2. Check if the freestanding tub has legs or not for adjust the level
3. Check if the freestanding tub has bottom reinforcement or not
4. Check if the freestanding tub has faucet separate or not
5. Check if you can cut the floor (slab) or not where you want to install the tub.
|
Fig. 1 |
Fig. 2 |
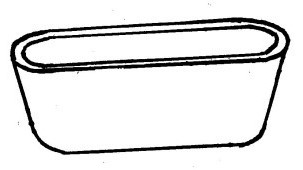
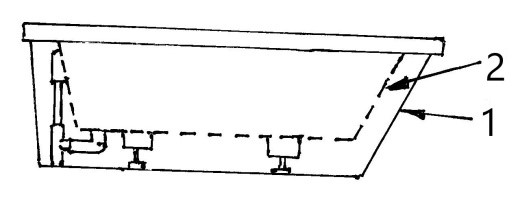
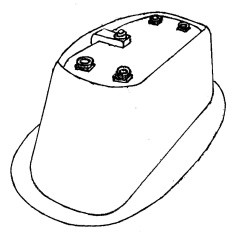
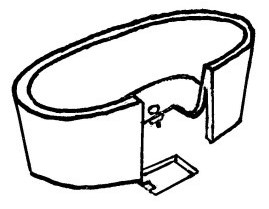
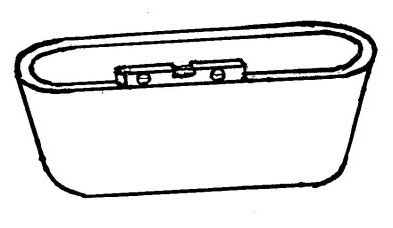
Fig. 1- One piece tub
Fig. 2- Two pieces tub: Part. 1-outside piece Part. 2-inside piece
Fig. 3-Two pieces tub with bottom reinforced
Fig. 4-Two pieces tub without reinforced
|
Fig. 3 |
Fig. 4 |
Fig. 5 |
The freestanding tub made from one piece can be attached to the floor with glue only.
The freestanding tub made from two pieces can be attached to the floor with glue or with screws (screws and glue).
For the Freestanding tub with bottom reinforcement is hard to install Flex p-trap above the floor.
The Freestanding tub with faucet separate is easier to install the tub on the floor.
If you can’t cut the floor where you want to install the tub, use the Flex Freestanding tub-extension tube.
3. Information for Flex Freestanding tub P-trap
It is impossible to connect the strainer of the freestanding tub with a rigid p-trap (rigid draining line) without the tub leaking on strainer, because of the 1.0 degree tolerance on strainer will be 1/8 inches
to rigid p-trap and rubber washers will not compensate this tolerance. For this reason manufacturing company will deliver the tub with detached strainer and flexible connecting tube.
The space under tub is 3.5-5.0 inches and is impossible to install p-trap with 2.0 inches water seal under tub without cutting the floor. The p-trap with water seal under 2.0 inches it is not recommended in USA.
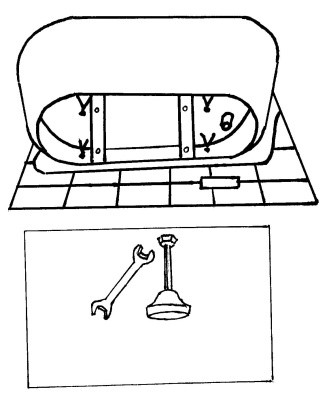
Fig. 5 For freestanding tub with 3.0 inches strainer we need minimum 8.0 inches under freestanding tub to install regular p-trap (two inches water seal). Because this space is not useful the manufacturing company made the freestanding tub with 3.5-5.0 inches under tub and the plumber will cut the floor to install the tub.
Installations instructions for one piece Freestanding Tub-no legs (not reinforced)
Step-by-step
The installation instruction for Flex P-trap drain can’t be used without installation instruction of freestanding tub. The strain draining comes installed by the manufacturer; if not installed, use Strain draining installation provided by manufacturer.
It is impossible to fit (adjust) the freestanding tub with rigid p-trap without to leaking later. Because of tolerances of parts and incorrect installations of tub, the freestanding tub will leak or sewer gas will escape in bathroom .The Flex P-trap will eliminate all these problems. If manufacturer does not supply P-trap you can use Flex P-trap.
First, you have to check the Installation instruction of freestanding tub.
Second, you check the space under the floor.
Third, you choose the Flex BP-trap/14 or Flex CP-trap/18. Flex FB-trap/24
Fourth, you have to read installation instructions of flex p-trap
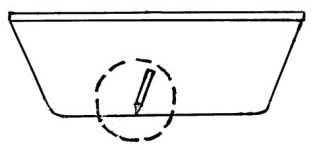
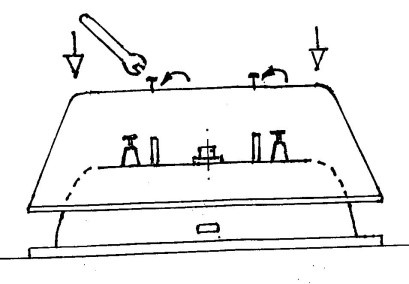
Step 1. Place the freestanding tub in the instaled position on the floor and trace the outline of the bath with a pencil or erasable marking.
|
Step 1 |
Step 2 |
Step 3 |
|
Step 4 |
Step 5 |
Step 6 |


Step 2. Choose the Flex BP-trap/14 or Flex CP-trap/18 and cut the floor. Install the draining line in middle of floor opening. (see the installation instruction of Flex BP-trap/14 , Flex CP-trap/18 or Flex FB-trap/24)
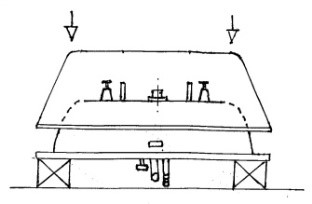
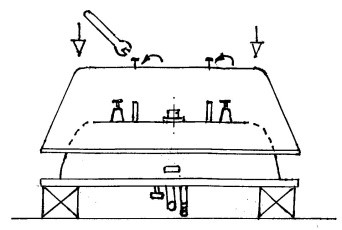
Step 3. Tilt the tub on the side over blanket and install strainer extension.
Step 4. Lift up the tub with 4x4 wood block and connect the Flex P-trap. Follow the installation instruction of Flex BP-trap/14, Flex FB-trap/24 or Flex CP-trap/18
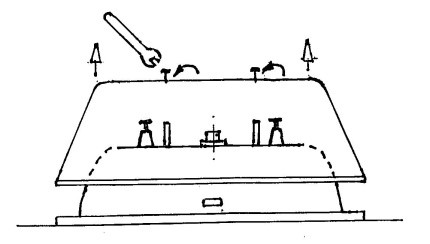
Step 5. Check the leveling of tub and lift up the tub with shims. Apply a silicone around the bottom of the bathtub and removed the shims.
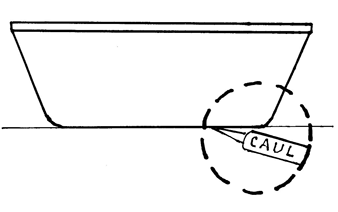
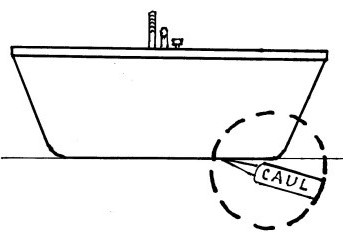
Step 6. Apply a tile caulk around the bottom edge of the bathtub.
Installations instructions for one piece Freestanding Tub-with legs (reinforced)
Step-by-step
First, you have to check the Installation instruction of freestanding tub.
Second, you check the space under the floor.
Third, you choose the Flex BP-trap/14 or Flex CP-trap/18.
Fourth, you have to read installation instructions of flex p-trap
Step 1. Place the Freestanding Tub in the instaled position on the floor and trace the outline of the bath with a pencil or erasable marking.
|
Step 1 |
Step 2 |
Step 3 |

Step 2. Choose the Flex BP-trap/14 or Flex CP-trap/18 and cut the floor. Install the draining line in middle of floor opening. (see the installation instruction of Flex BP-trap/14 or Flex CP-trap/18)
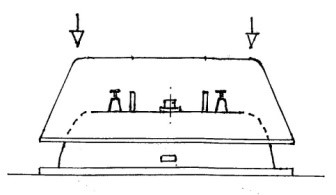
Step 3. Tilt the tub on the side over blanket and adjust the legs of tub to be the same level
Step 4. Check the leveling of tub.
|
Step 4 |
Step 5 |
Step 5. Lift up the tub with 4x4 wood block and connect the Flex P-trap. Folow the installation instruction of Flex BP-trap/14 or Flex CP-trap/18
Step 6. Check the leveling of tub and lift up the tub with shims. Apply a silicone around the bottom of the bathtub and removed the shims.
Step 7. Apply a tile caulk around the bottom edge of the bathtub.
|
Step 6 |
Step 7 |


Installations instructions for two-pieces Freestanding Tub-assembled with clamps step by step
First, you have to check the Installation instruction of freestanding tub.
Second, you check the space under the floor.
Third, you choose the Flex BP-trap/14 or Flex CP-trap/18.
Fourth, you have to read installation instructions of flex p-trap.
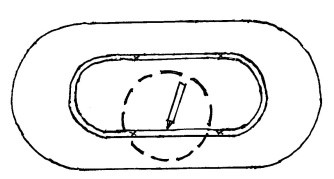
Stap 1. Place the Freestanding Tub in the instaled position on the floor and trace the outline of the bath with a pencil or erasable marking.
Step 2. Turn upside down the tub over blanket and dissasembly the freestanding tub
Step 3. Lay down outside part of freestanding tub (part 1) over contur marked on the floor in Step 1 and trace the inside contur of part 1with a pencil.
Step 4. Choose the Flex BP-trap/14 or Flex CP-trap/18 and cut the floor. Install the draining line in middle of floor opening. (see the installation instruction of Flex BP-trap/14 or Flex CP-trap/18)
|
Step 1 |
Step 2 |
Step 3 |
|
Step 4 |
Step 5 |
Step 6 |


Step 4. Choose the Flex BP-trap/14 or Flex CP-trap/18 and cut the floor. Install the draining line in middle of floor opening. (see the installation instruction of Flex BP-trap/14 or Flex CP-trap/18)
Step 5. Check the leveling of legs.
Step 6. Install the faucet if the tub has one, if it doesn’t have one skip the step 6 and 7
|
Step 7 |
Step 8 |
Step 9 |
Step 7. Lift up the tub with wood block to protect the faucet, reassembly the tub and check the leveling of legs.
Step 8. If the freestanding tub don’t have faucet turn upside down the inside tub (part 2.) over blanket, reasembly the freestanding tub and check the leveling of legs.
Step 9. Lift up the tub with 4x4 wood block and connect the Flex P-trap. Folow the installation instruction of Flex BP-trap/14 or Flex CP-trap/18
Step 10. After you connect the draining line lift up inside part of tub (part 2) with 2x4 wood block and connect outside part of tub ( part 1) with floor with 4 screws.
Step 11. Apply a tile caulk around the bottom edge of the bathtub.
|
Step 10 |
Step 11 |
Installations instructions for two-pieces Freestanding Tub-assembled with screws step-by-step
First, you have to check the Installation instruction of freestanding tub.
Second, you check the space under the floor.
Third, you choose the Flex BP-trap/14 or Flex CP-trap/18.
Fourth, you have to read installation instructions of flex p-trap.
Step 1. Place the Freestanding Tub in the instaled position on the floor and trace the outline of the bath with a pencil or erasable marking.
|
Step 1 |
Step 2 |
Step 3 |
|
Step 4 |
Step 5 |
Step 6 |


Step 2. Choose the Flex BP-trap/14 or Flex CP-trap/18 and cut the floor. Install the draining line in middle of floor opening. (see the installation instruction of Flex BP-trap/14 or Flex CP-trap/18)
Step 3. Turn upside down the tub over blanket and disassembly the freestanding tub
Step 4. Check the leveling of legs and adjust the legs of tub to be the same level
Step 5. Check the outside part of tub (part 1)
Step 6. Install the faucet if the tub hase one, if dosent’t have one skip the step 6 and 7
|
Step 7 |
Step 8 |
Step 7. Lift up the tub with wood block to protect the foset, assembly the tub and check the leveling of legs.
Step 8. If the freestanding tub don’t have foucet turn upside down the inside tub (part 2.) over blanket, assasembly the freestanding tub and check the leveling of legs.
Step 9. Lift up the tub with 4x4 wood block and connect the Flex P-trap. Folow the installation instruction of Flex BP-trap/14 or Flex CP-trap/18
Step 10. Check the leveling of tub and lift up the tub with shims. Apply a silicone around the bottom of the bathtub and removed the shims.
Step 11. Apply a tile caulk around the bottom edge of the bathtub.
|
Step 9 |
Step 10 |
Step 11 |