Flex P-Trap Installation
To install the Flex P-trap you don’t need any tools.
In some cases, you might need a drywall knife and a 1.25 inch diameter plastic tube, to cut the flexible tube to a specific length. The Flex P-trap can be used by home owners, in mobile homes, beauty salons, for bathtubs, freestanding tubs, pedestal sinks and shampoo bowl sinks. Each p-trap comes with specific installation instructions (example: "Installation instruction for Flex Bathtub p-trap", "Installation instruction for Flex Freestanding tub p-trap", "Installation instruction for Flex Shampoo bowl p-trap", etc.)
NOTE: When using Flex P-traps keep the plumbing codes in mind. Just because you can flex these fittings into odd configurations doesn’t mean that you should. The Flex P-trap should be used to make up a small misalignment while still following the basic standards of drain system design. This means no uphill drains or funky loops.
A. PLUMBING CODES
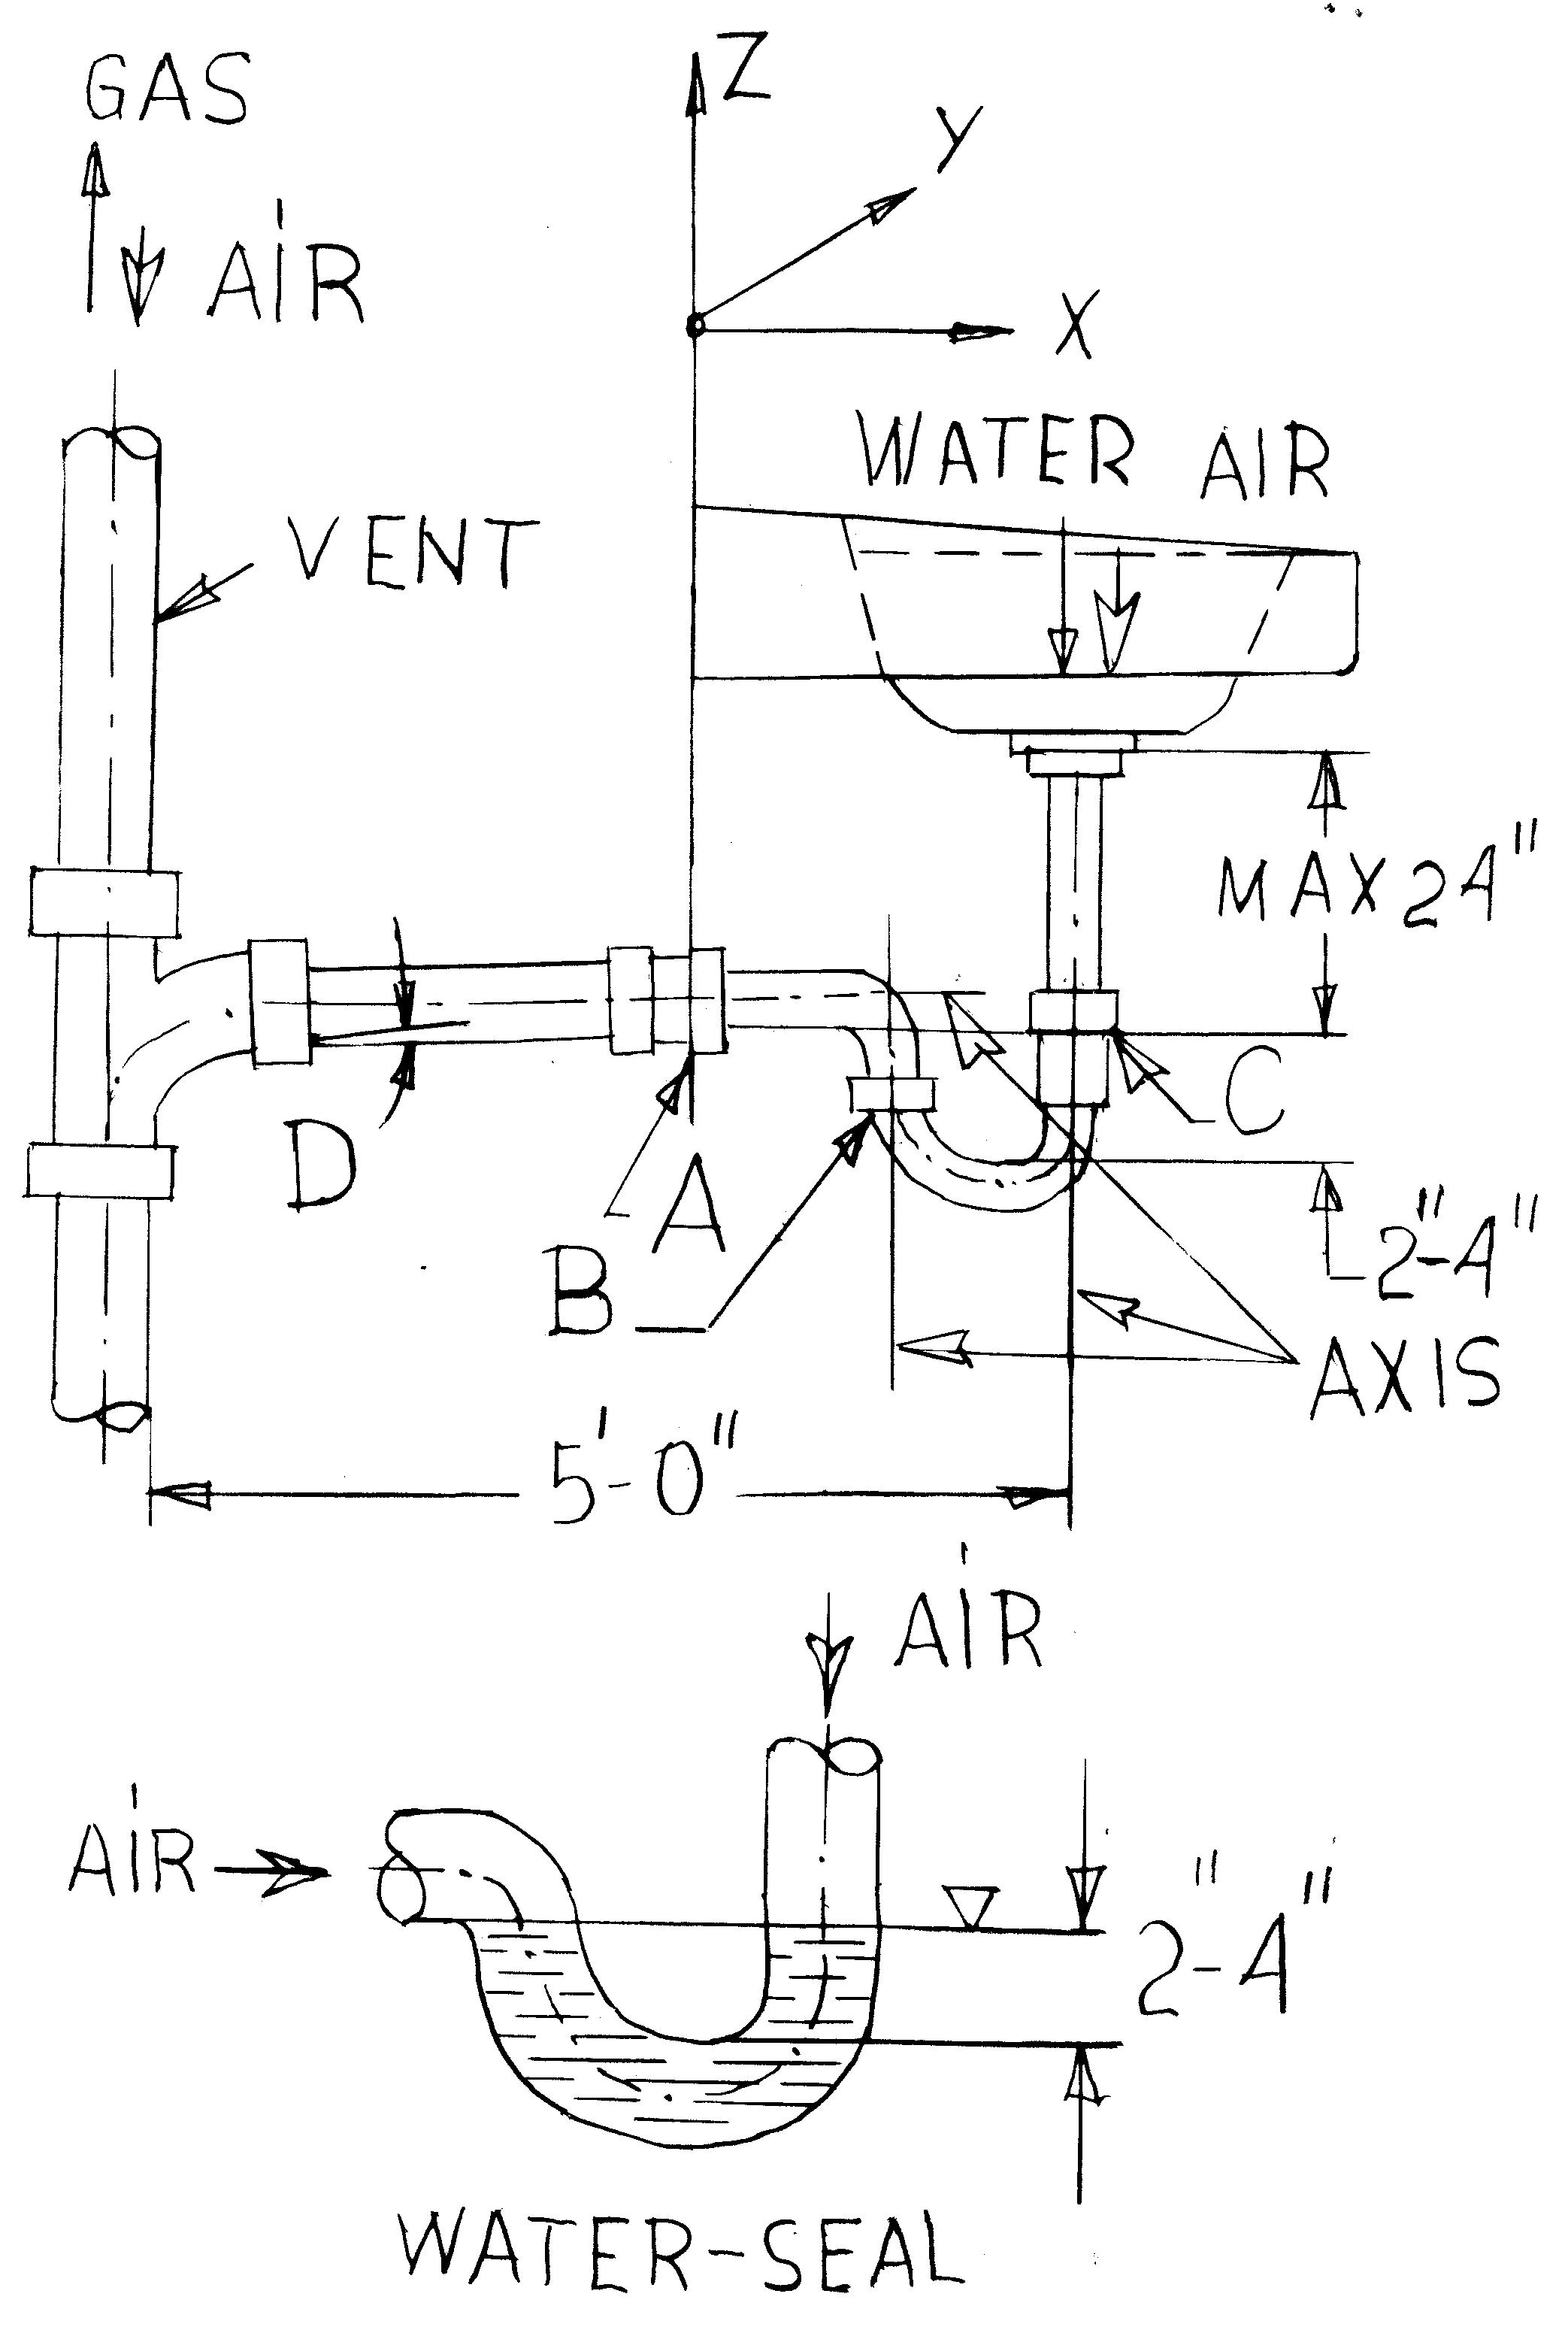 Fig.28
To install a regular trap, the sink has to be perfect in the horizontal position (not tilted to the left, right or front). A regular p-trap has 3 joints (A,B and C on Fig.28 above). Joint A adjusts the p-trap when the sink is tilted to the left or right, and adjusts the length of trap in X-Z plane. Using joint A, the trap can be rotated and translated to adjust the coordinate X. Using joint B, the trap can be rotated around axis Z (conic joint) when the sink is installed eccentric (so that the axis of the tailpiece is not in the same vertical plane with the center of the outlet draining). From joint B, adjust coordinate Y.When the axis of the tailpiece and the center of the outlet draining are in the same vertical plane (Y=0), the sink is centered. Joint C can be used to adjust the length of the tailpiece, coordinate Z.
The Regular p-trap can't be adjusted when the sink is tilted in the front. Because of this, some manufacturers replace the conic joint B with a ball joint; others use flexible extension tubes to connect the tailpiece with the p-trap, which is not approved by the inspectors. Because of this, plumbers use silicon in the join when the sink is not installed in the horizontal position.
B. WATER-SEAL
In order for the draining line of the sink to work properly, the following rules must be obeyed:
Rule 1. Vent location must be maximum 5 feet from the sink.
Rule 2. The slope of the draining pipe from the sink must be minimum 1.25 inches per foot (D).
Rule 3. Length of the tailpiece must be less than 24 inches.
Rule 4. The diameter of the p-trap for the kitchen sink must be 1.5 inches.
Rule 5. The diameter of the p-trap for the bathroom sink must be 1.25 inches.
Rule 6. Water-seal must be 2-4 inches deep.
If the diameter of the p-trap is less than 1.25 inches, the p-trap will self-siphon and the water-seal will dissapear. If the taipiece is over 24 inches in length, the gravity of the water will wash away the water-seal, similar to a rollercoaster. If the room is too dry, and the sink it used once in 2 weeks, the water-seal will evaporate. To prevent this from happening, you have to change the depth of the trap to be more than 2 inches. If the p-trap diameter is over 1.5 inches, the space under the sink is limited and it will be impossible to install the p-trap.
When the water is turned off, there will be air on both ends of the water-seal, so the force to push the water-seal is zero. If the vent is clogged, the sewer gas will push the water-seal away (back-pressure), and the gas will escape in the room. When two sinks are installed one above the other (first floor and second floor) and connected to the same draining line, water from the above sink creates partial vacuum (back-venting), which sucks the water out of the lower sink's trap; this problem is solved using a deep seal p-trap. Using a deep seal trap has some advantages and disadvantages: a deep trap has a deeper seal with more water, therefore the seal doesn't evaporate as quickly; a deep seal p-trap can withstand a greater back-pressure of back-venting. Because of the increased depth and capacity, it is more resistent than a standard p-trap (2 inches water-seal), but the corrugated tube increases the turbulence.
The flex p-trap has an inside diameter with 1/16" (per radius) over regular p-trap for bathroom, and with 1/16" (per radius) less than the regular p-trap for kitchen.
The p-trap from schedule 40 is made (glued) by the plumber on the plumbing local code.
Each plumbing inspector has his philosophy according to the local plumbing code; because of this, you might need to choose the standard p-trap. If you can't install the standard trap, you may use the Flex P-trap.
C. CONNECTIONS
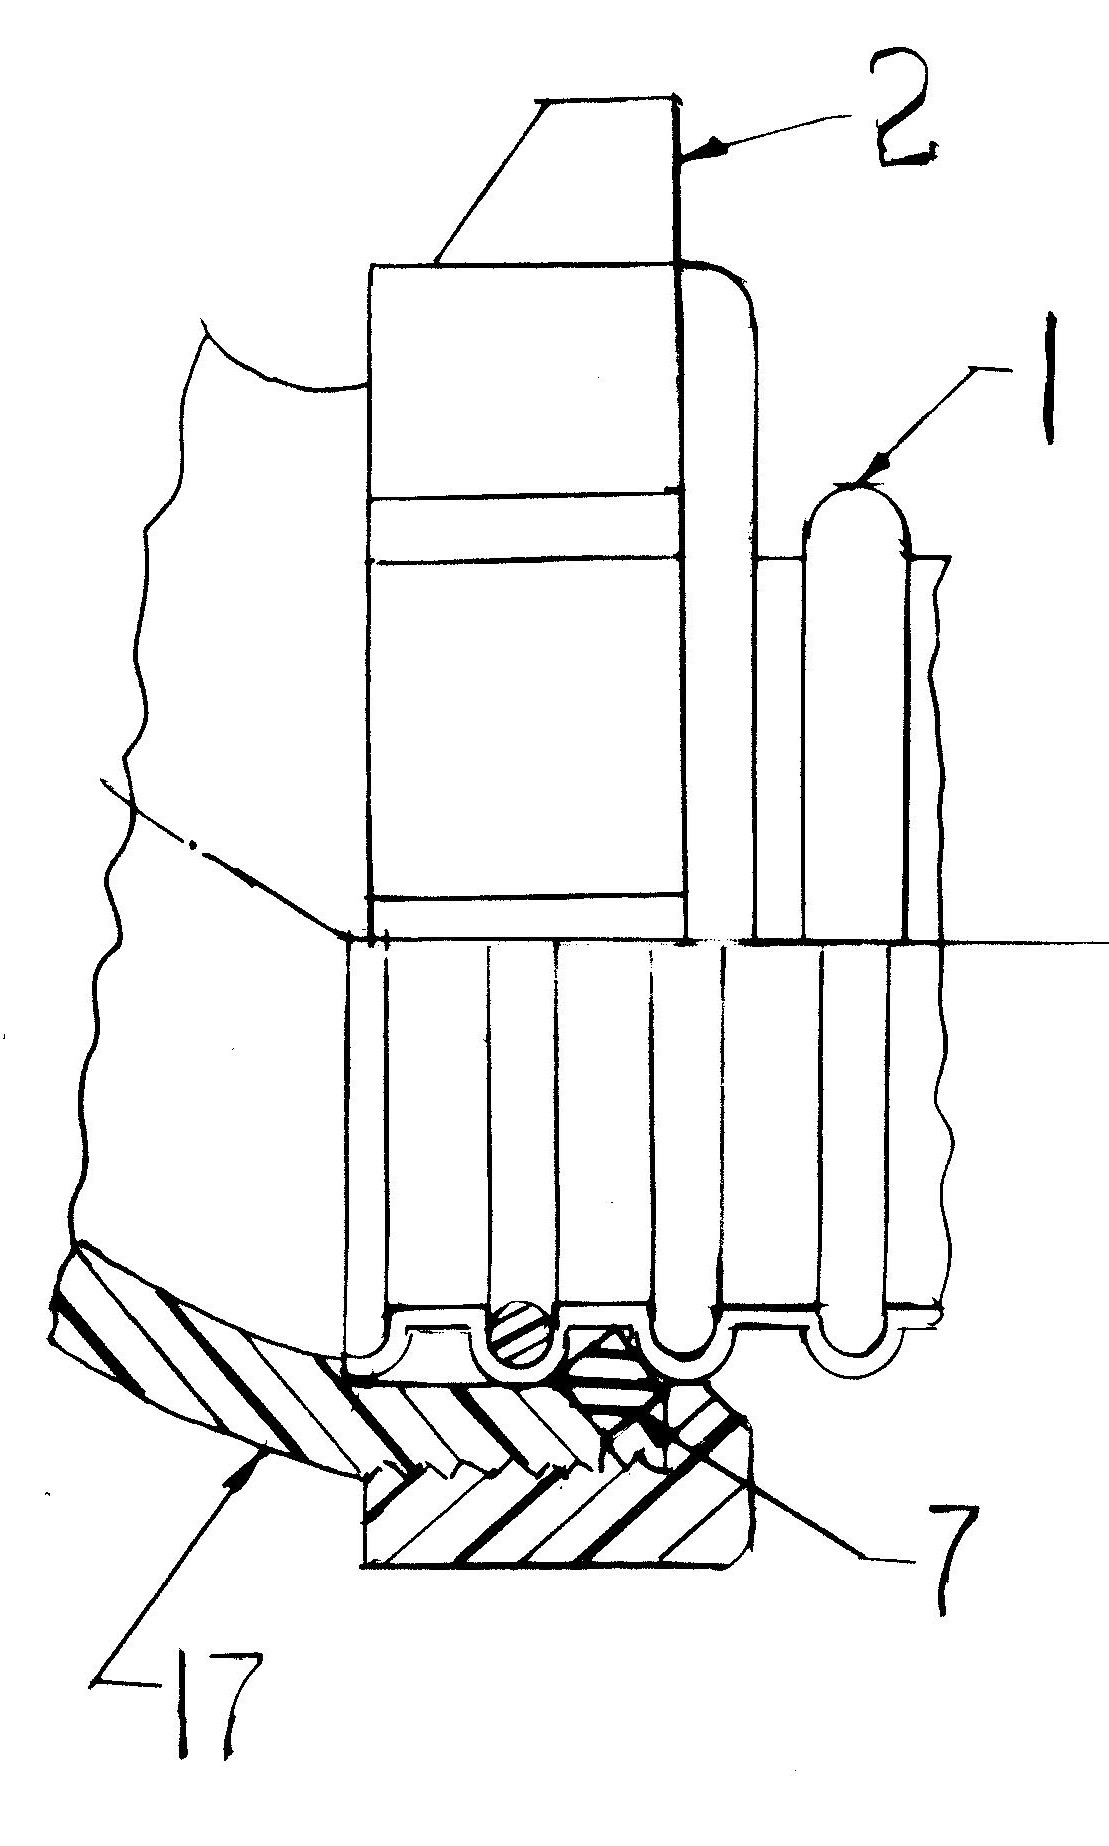
1. Connecting the Flex P-trap with the plumbing fixtures, the flexible tube is cut in the middle of the rib or bottom of the cannels, see the drawings.
2. For easy to assembly the brass nut or plastic nuts with a strainer mark M1 where start the tread of slip joint nut Fig.13 and with M2 mark on a strainer where the nut start to engage in the strainer’s tread and connect the Flex P-trap with a strainer.
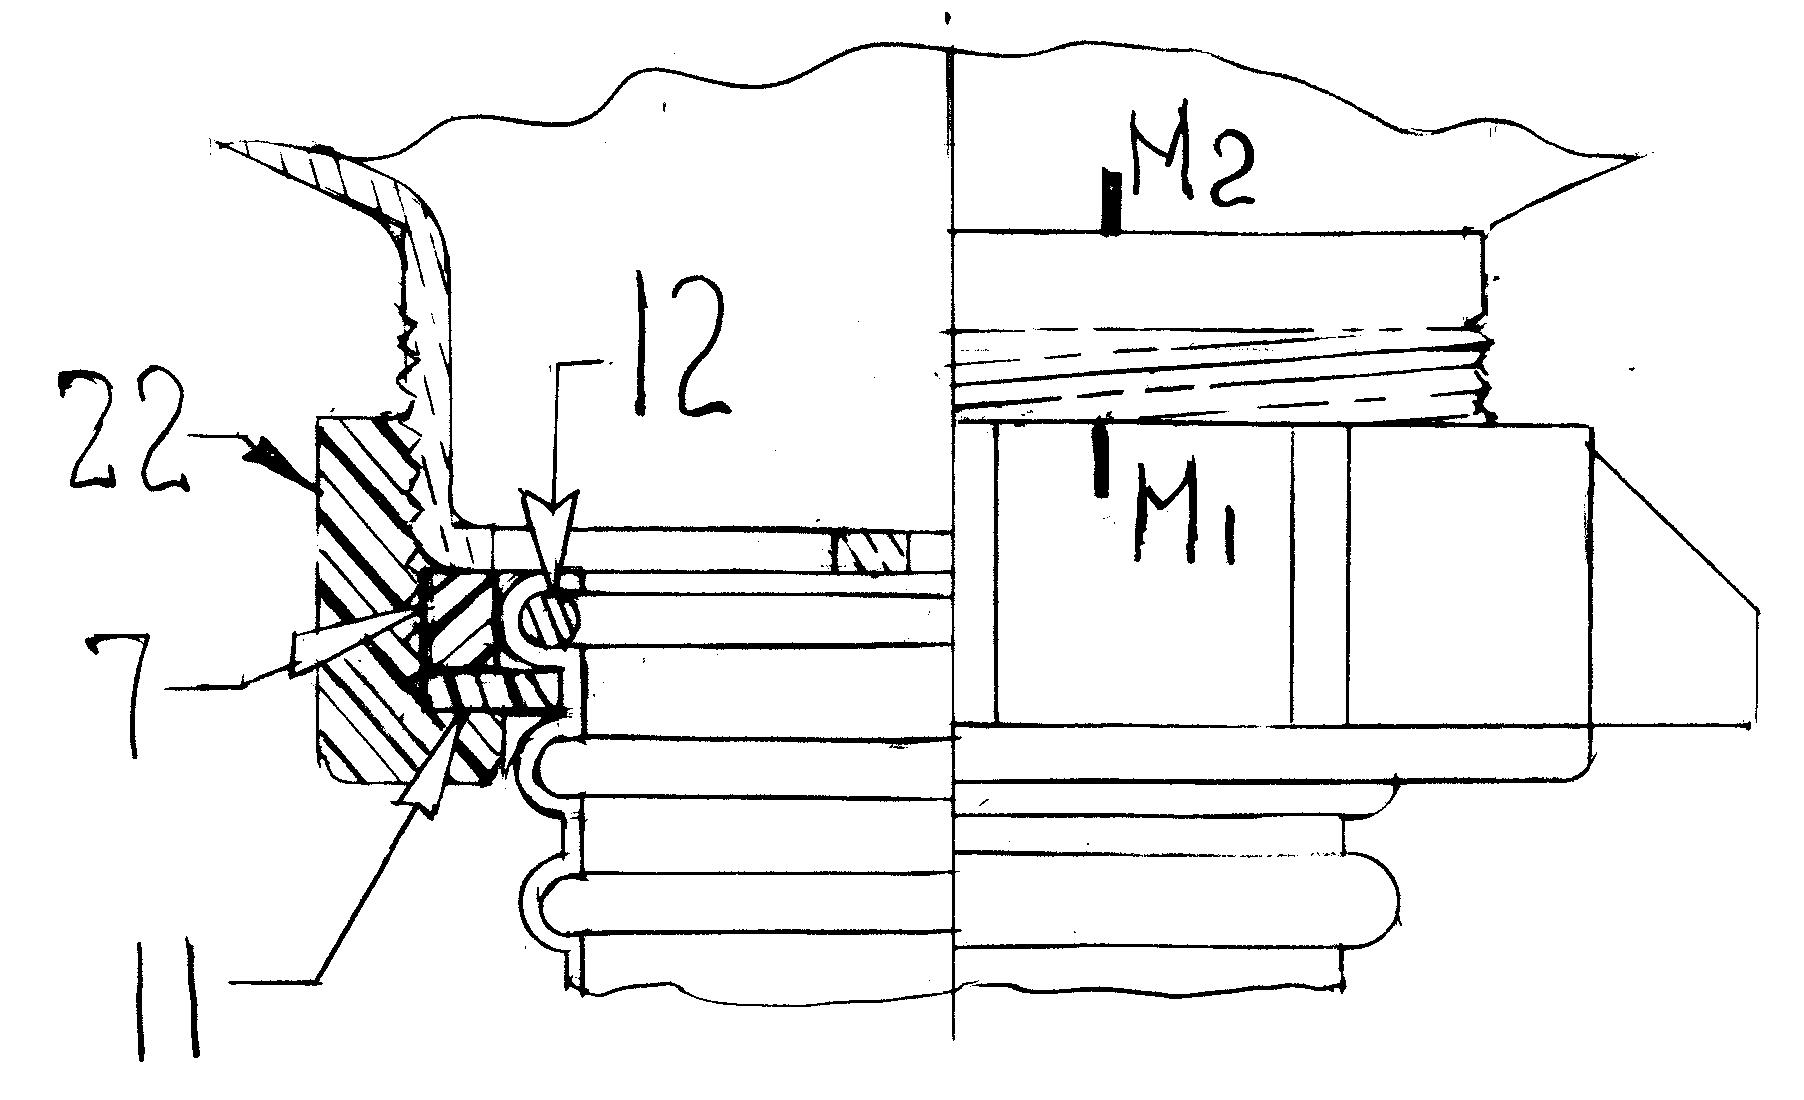
Fig.13 (video 20A)
 |
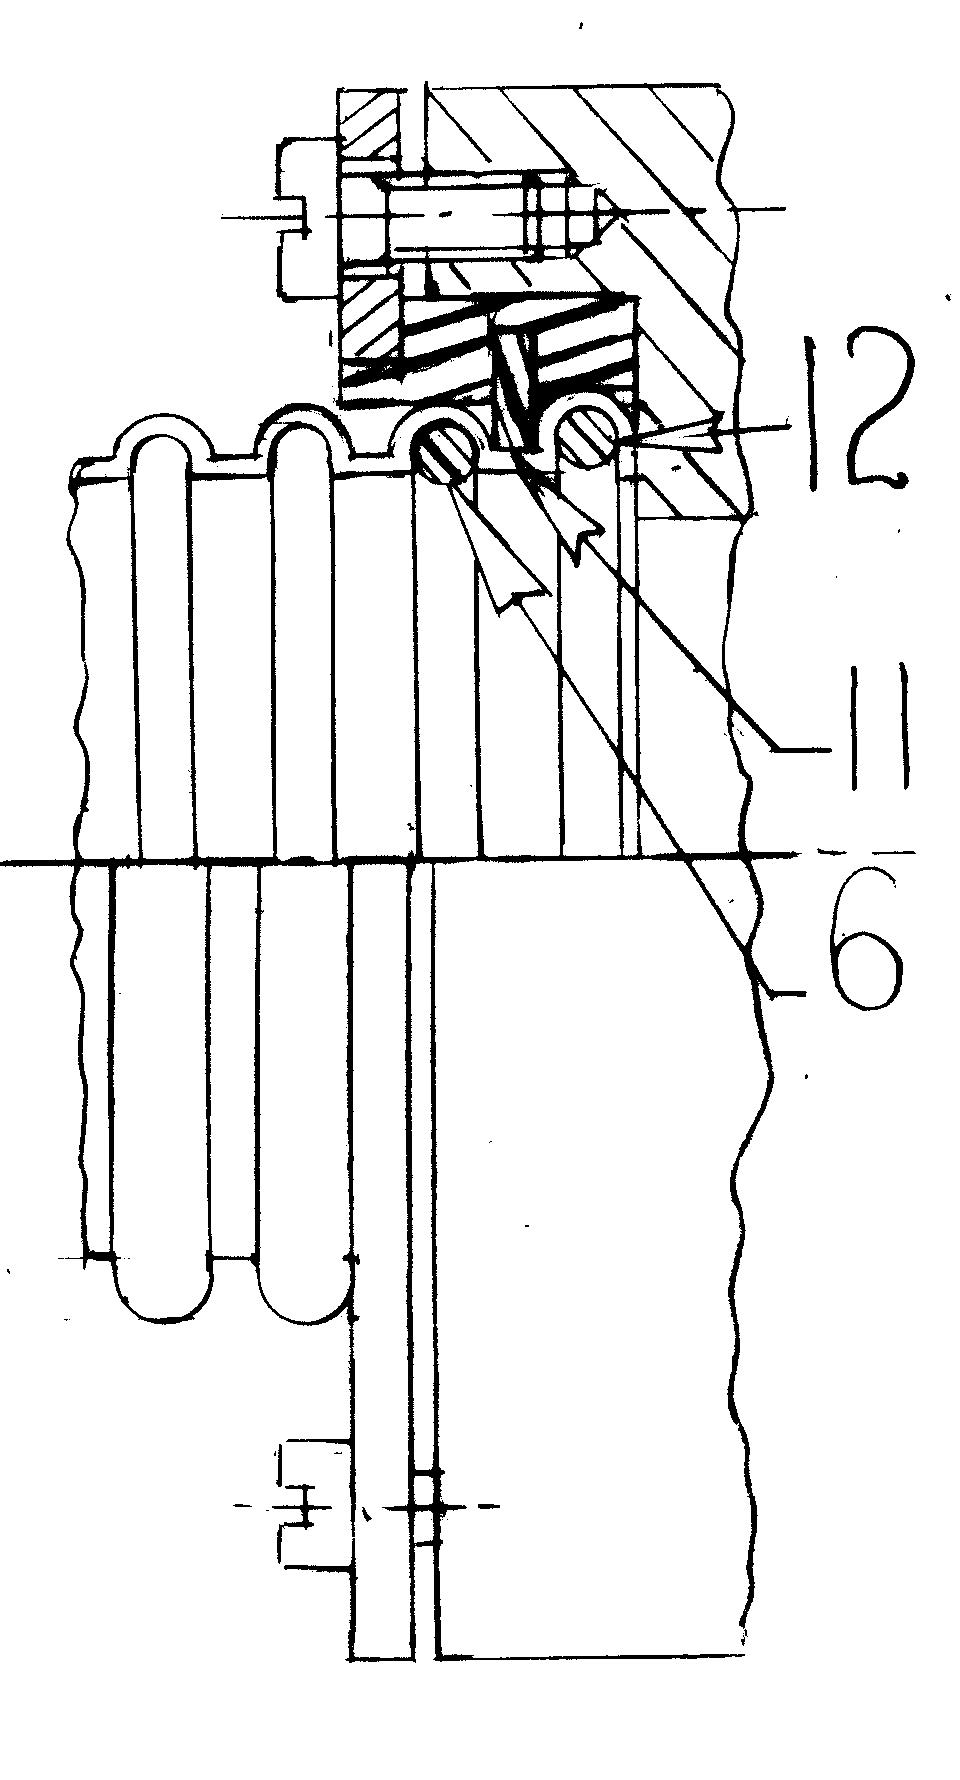 |
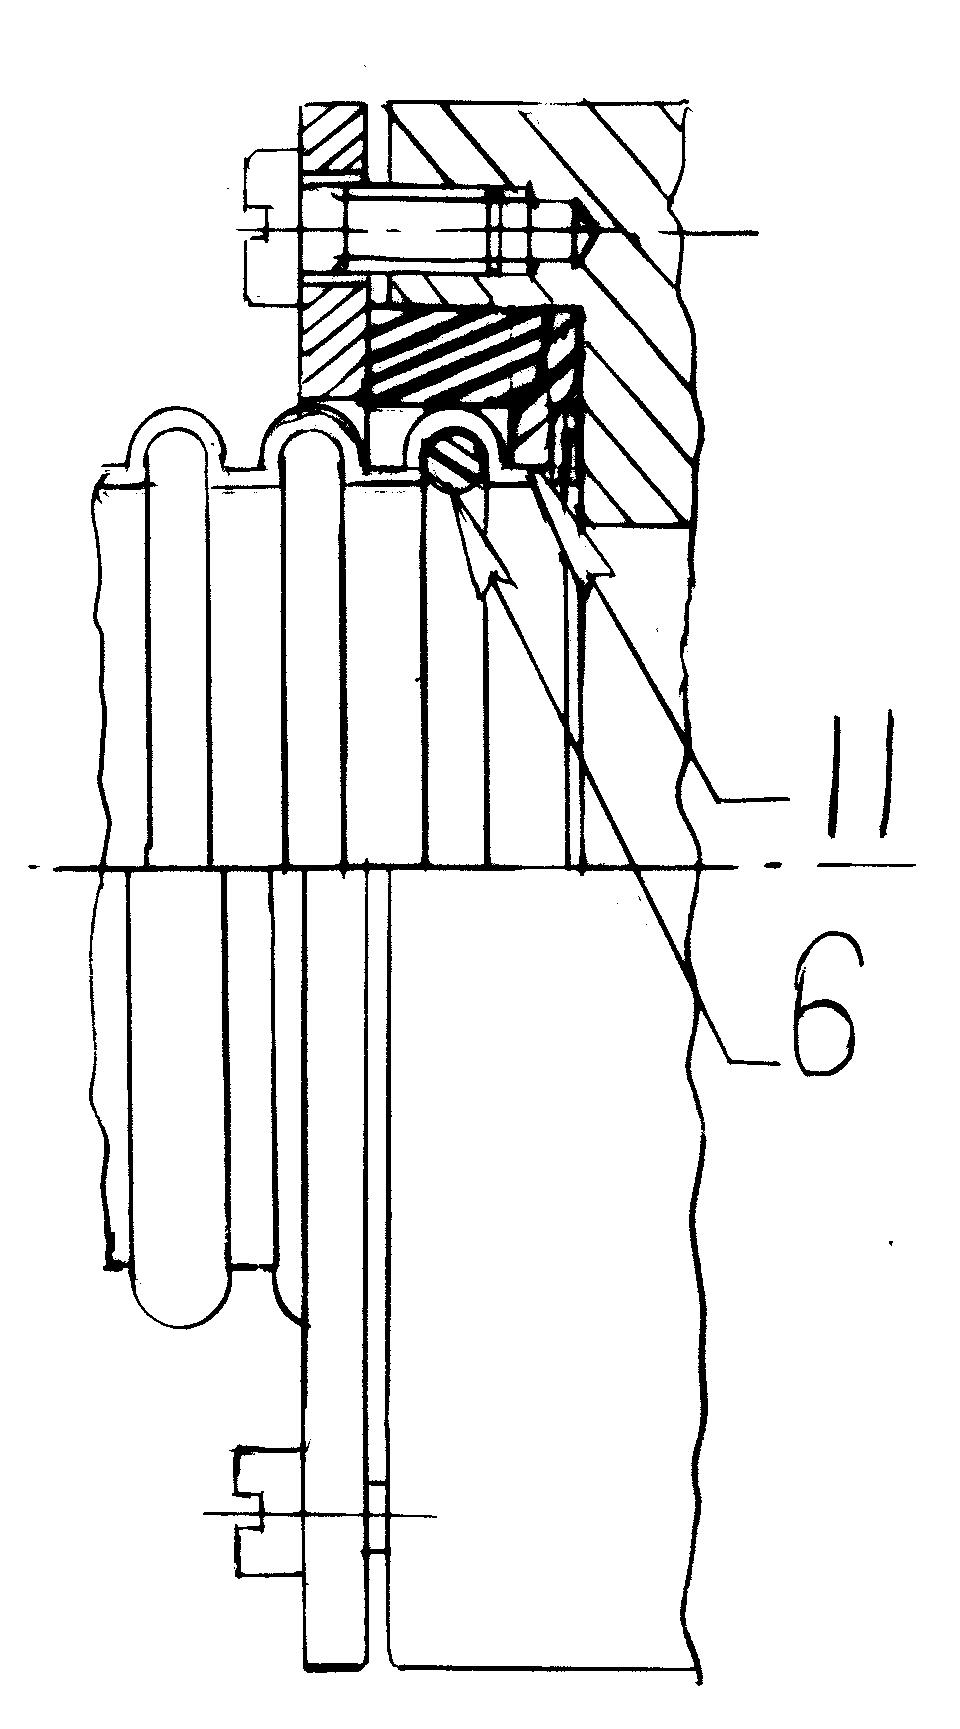
| Fig. 14A (video 14A) | Fig.14B (video 14B) |
3. To connect the Flex P-trap with the the Garbage Disposer, the flexible tube has one plastic holder (Pos.11, Fig.14B) and two retainers (pos.6, green 013), pos.12 (red 010) installed already. Each Disposer has one Gasket tailpiece for seal and one Flange tailpiece used to hold the gasket. If the Garbage Disposer has a simple gasket, do not use the retainer in pos.12, but instead use Fig.14A. If the Garbage Disposer has a special gasket with an inside grove, use the retainer from pos.12, Fig.14B. The Flex P-trap connected with the Garbage Disposer will eliminate vibrations completely. Please see video 21A for more details.
 |
 |
| Fig.16 | Fig.15 |
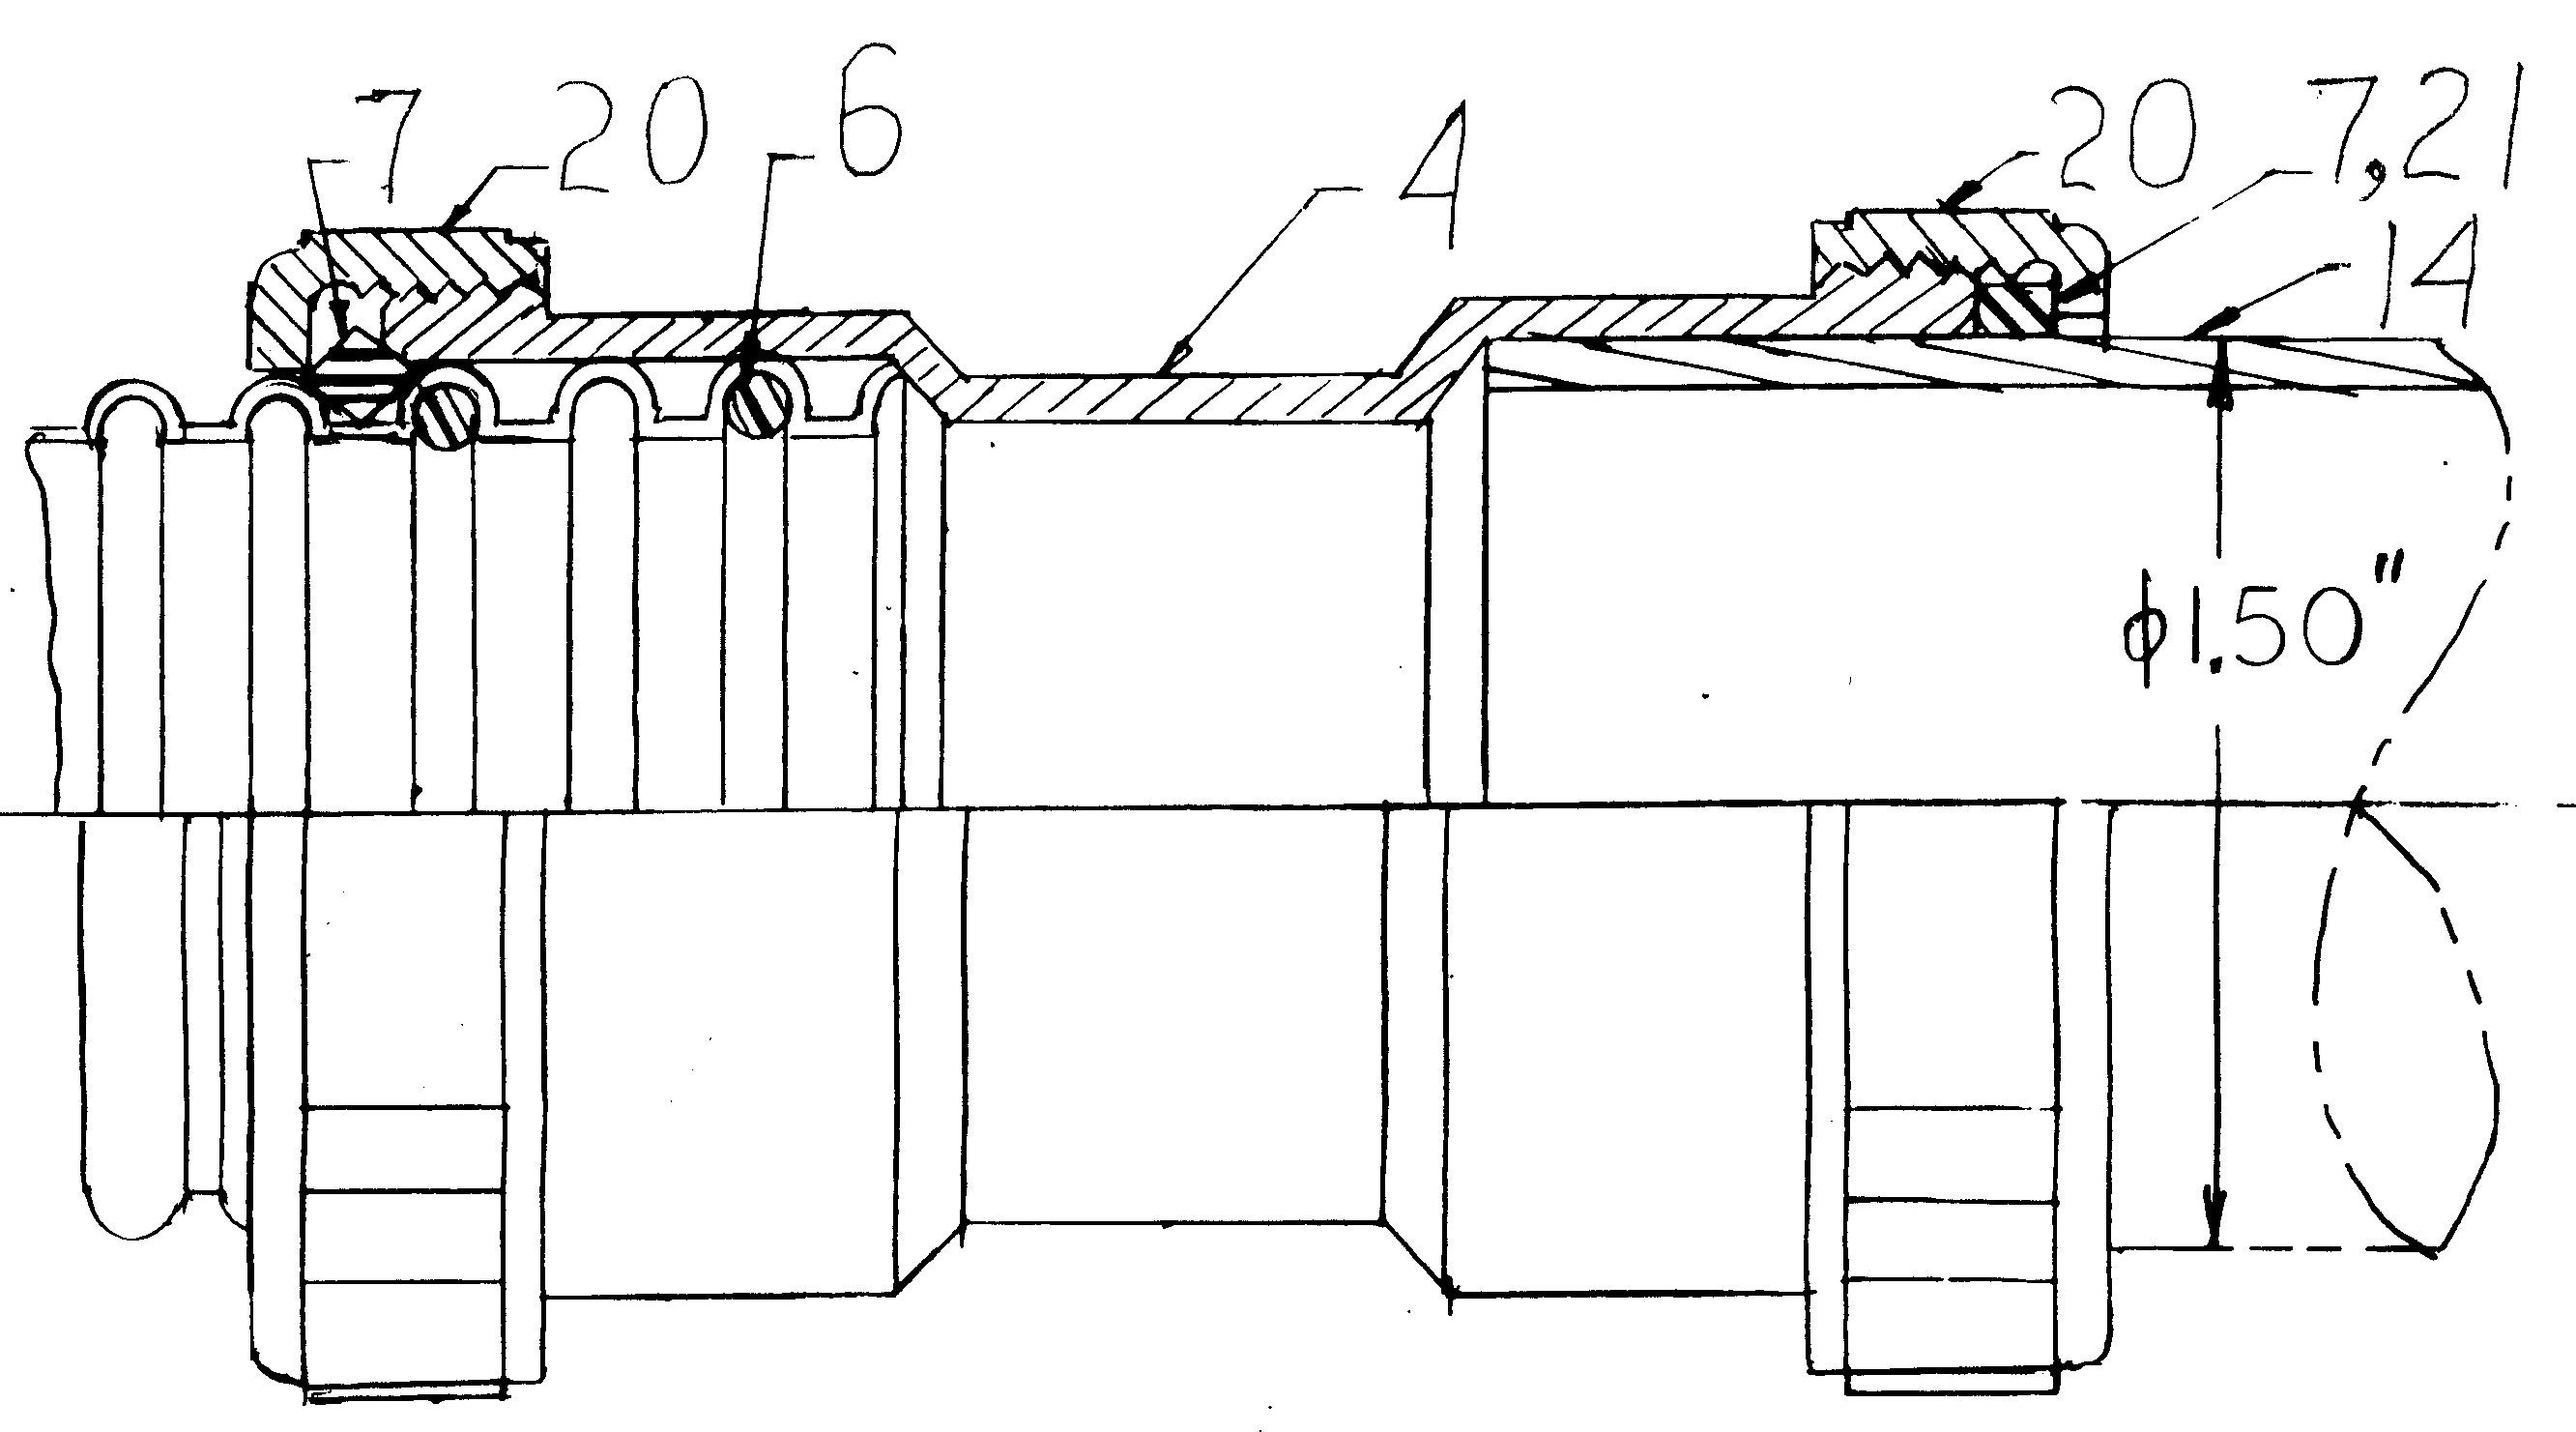
Fig.17
4. The Adaptor could be used only for a special situation (S-trap, SP-trap), to keep the Flex P-trap cost-effective.
5. The Rubber cord is used all time because the heavy garbage particles and the hot-cold water will stabilize the U-shape of the trap.
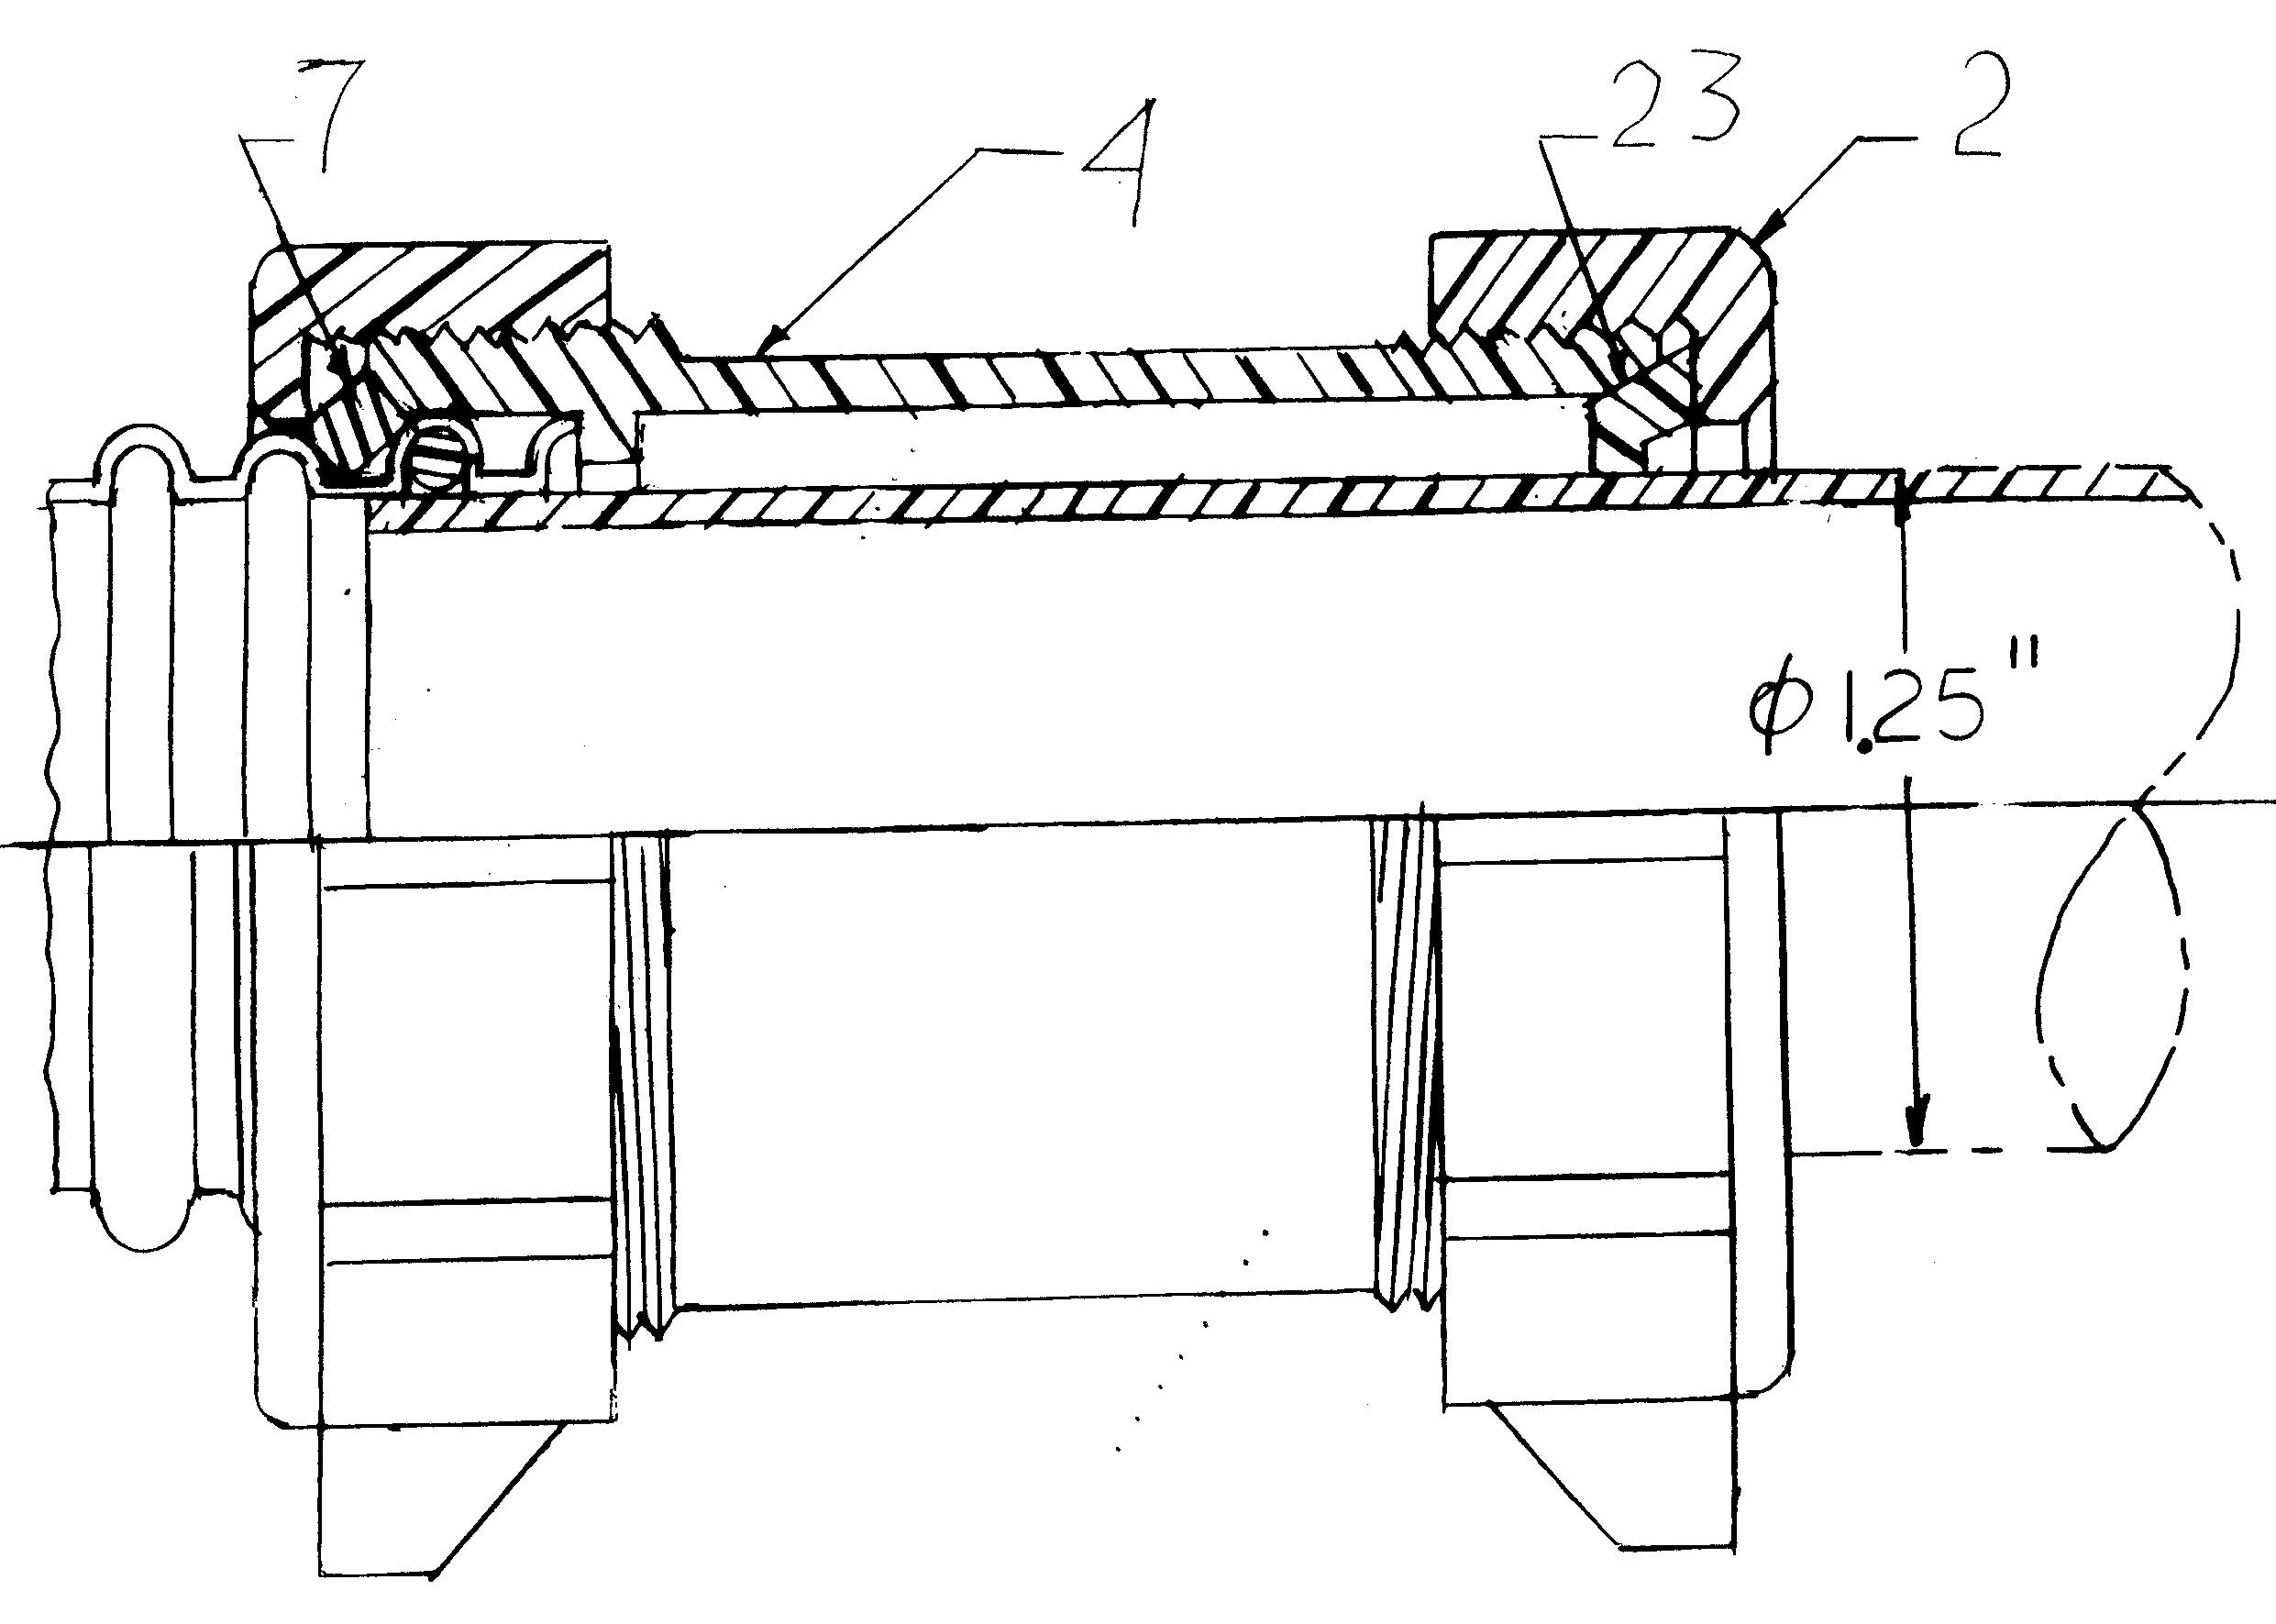
6. Connecting the slip joint nut 1.25 inch to flexible tube will squeeze the tube and the nut will slip over the rib.

